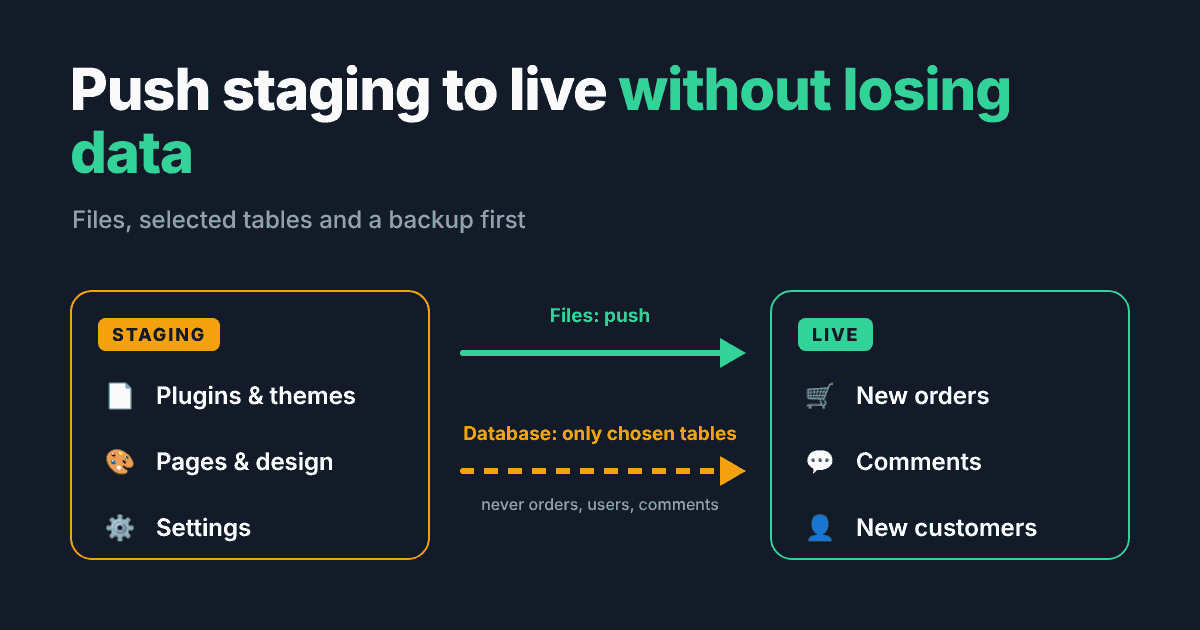
Building changes on a staging copy is the easy part. The risky moment is when you push staging to live. Copy the wrong thing and you can wipe out orders, comments or sign-ups that came in while you were working. This guide explains what a push actually moves, what to keep away from it, and three ways to do it safely: a full push, a selective push, and a manual push with WP-CLI.
New to staging? Start with our guide on how to create a WordPress staging site, then come back here.
What "push staging to live" actually moves
A WordPress site is two things: files (WordPress core, plugins, themes, uploads) and a database (posts, pages, settings, users, comments and, on a store, orders). A push copies some or all of both from staging over the live site.
Files are usually the safe part. If you updated a plugin or edited a theme on staging, copying those files to live is exactly what you want.
The database is where things go wrong. Your staging copy is a snapshot from the moment you cloned it. The live site keeps changing after that. If you copy the whole staging database over live, everything that happened on live since the clone is gone.
What changes on live while you work on staging
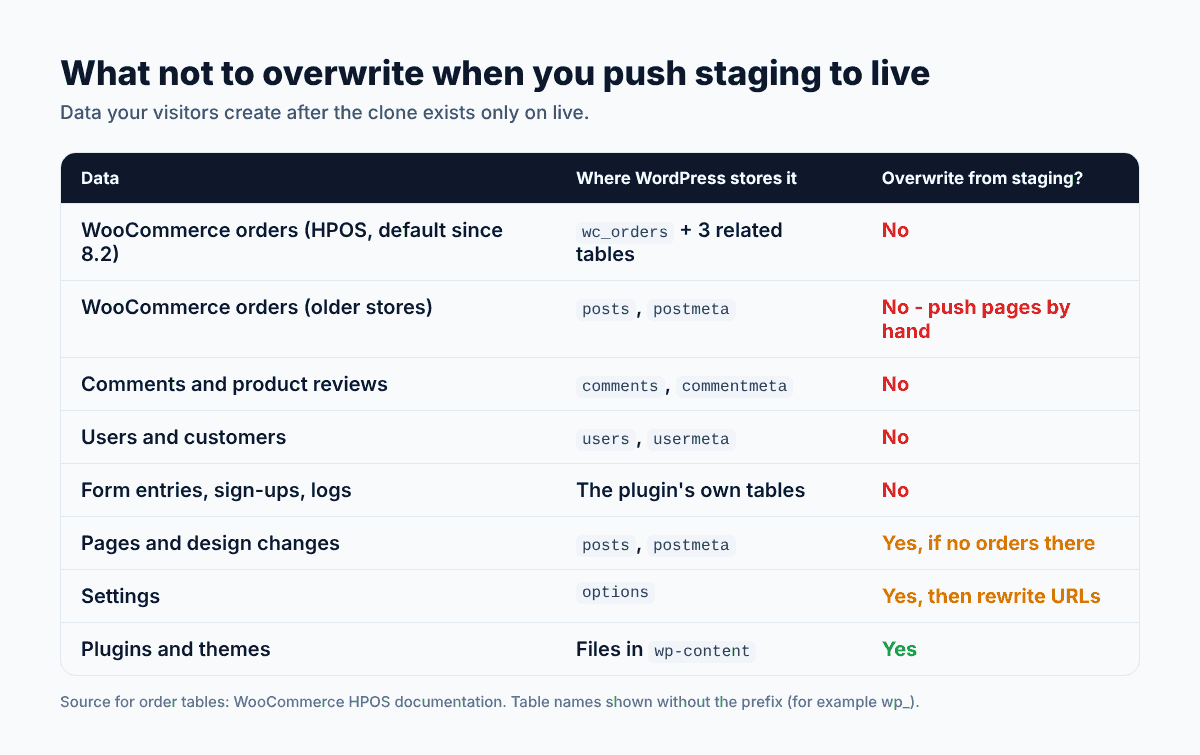
- WooCommerce orders. Since WooCommerce 8.2 (October 2023), new stores keep orders in their own tables (
wc_orders,wc_order_addresses,wc_order_operational_data,wc_orders_meta), according to the WooCommerce HPOS documentation. Older stores that never switched still keep orders inpostsandpostmeta, the same tables as your pages. That detail matters a lot, as you will see below. - Comments and reviews live in
commentsandcommentmeta. Product reviews are comments too. - New users and customers live in
usersandusermeta. - Form entries, newsletter sign-ups and logs usually live in tables created by the plugin that collects them.
- New media uploads live as files in
wp-content/uploadsplus rows inpostsandpostmeta.
The rule of thumb: anything your visitors create belongs to live. Anything you create (design, settings, new pages, plugin updates) can come from staging.
Before you push: a 6-point checklist
- Back up live first. A full backup of files and database, taken right before the push, not last week's.
- Write down what you changed on staging. Plugins updated, pages edited, settings changed. This tells you which files and tables you need.
- Check what changed on live since the clone. New orders, comments, users, form entries.
- Pick the push type. Full push only if nothing in the live database needs to survive. Otherwise a selective push.
- Choose a quiet time. The fewer visitors, the fewer new orders or comments can arrive during the push.
- Clear caches after the push (plugin cache, server cache, CDN) and test the key pages.
Method 1: Full push (simple sites only)
A full push copies all files and the whole database from staging to live. It is fast and simple, and it is fine when the live database has nothing new worth keeping: a brochure site with no comments, no forms that store entries, no store. A good habit is a short "content freeze": nobody edits the live site between the clone and the push.
Do not use a full push on a WooCommerce store that is taking orders, a membership site, or a blog with active comments. You will lose whatever came in after the clone.
Method 2: Selective push (files plus chosen tables)
A selective push moves only what you changed. Typical cases:
- Plugin or theme updates: push the files. Many updates also change settings in
options, so test after the push. - Settings changes (theme options, plugin settings): these live in
options. Pushing the wholeoptionstable also copies the staging site address, so the tool you use must rewrite URLs (see Method 3). - New or redesigned pages: these live in
postsandpostmeta.
Here is the trap. On a store that still keeps orders in posts and postmeta, pushing those tables to publish a redesigned page also overwrites every order placed since you cloned. If that is your setup, either check in WooCommerce settings whether High-Performance Order Storage is enabled, or rebuild the page changes on live by hand instead of pushing the tables.
Selective push with Revertix
Our plugin Revertix creates staging copies for free. Pushing changes back is a Pro feature: you push from staging to live (or pull live into staging) and choose exactly what to move, files and/or selected tables. A full safety backup of the live site is taken automatically before every push, so you can restore it if something looks wrong.
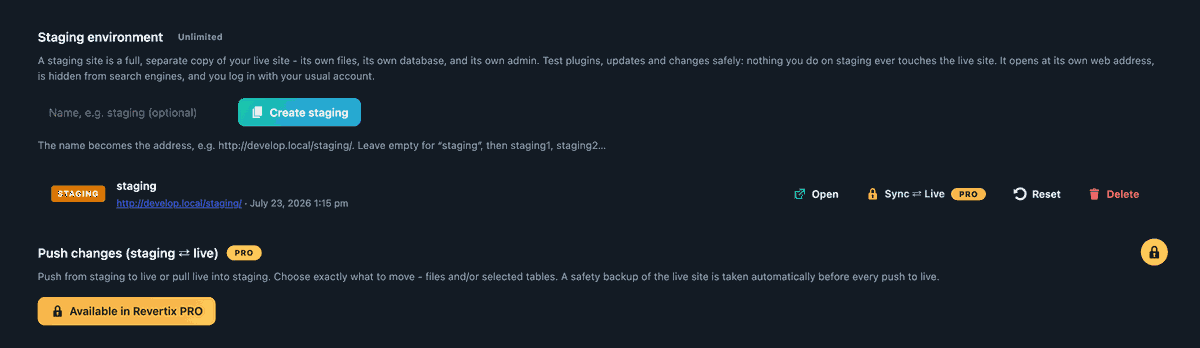
The Personal plan includes a one-click full sync. The Business and Agency plans add a detailed sync, where you review every changed file and database row, down to a line-by-line diff, and apply only what you pick. Plans and prices are on the Revertix page.
Method 3: Manual push with WP-CLI
If you have SSH access, you can do a selective database push yourself with WP-CLI. The example assumes staging and live use the same table prefix (wp_) and you only want to move pages and their meta. Adjust table names to your prefix.
1. On staging, export only the tables you changed:
wp db export staging-pages.sql --tables=wp_posts,wp_postmeta2. On live, back up the full database first:
wp db export live-before-push.sql3. On live, import the staging tables:
wp db import staging-pages.sql4. Rewrite the staging address to the live address. Run it with --dry-run first to see how many rows would change:
wp search-replace 'https://staging.example.com' 'https://example.com' --skip-columns=guid --dry-run
wp search-replace 'https://staging.example.com' 'https://example.com' --skip-columns=guid
The WP-CLI documentation notes that search-replace "intelligently handles PHP serialized data". That is why you should use it instead of a find-and-replace in a text editor or plain SQL, which can break serialized settings from page builders and WooCommerce.
5. Copy changed files (plugins, themes, uploads) with your usual method, for example SFTP or rsync, then flush caches:
wp cache flushRemember the warning from Method 2: importing wp_posts and wp_postmeta replaces everything in them, including orders on stores that do not use HPOS, and any posts or media added on live since the clone.
After the push: test and keep a way back
- Open the home page, a few key pages and the main menu in a private browser window.
- On a store, place a test order or at least go through cart and checkout.
- Submit your contact form and check that the email arrives.
- Check that recent orders, comments and users from live are still there.
- If something is wrong, restore the backup you took right before the push. That is the whole point of taking it.
If a plugin update is what broke the site, rolling back that single plugin is often faster than a full restore. Our guide to fixing a WordPress white screen after a plugin update walks through it.
FAQ
Can I push staging to live without losing WooCommerce orders?
Yes, with a selective push. Do not overwrite the order tables. On stores using High-Performance Order Storage those are the wc_orders tables; on older stores orders sit in posts and postmeta, so pushing those tables will overwrite them.
Does pushing staging to live cause downtime?
Usually only a short moment while files and tables are replaced. Pushing at a quiet time and clearing caches right after keeps it minimal.
Do I need to change URLs after a push?
Yes, if staging runs at a different address. Any staging URL saved in the database must be rewritten to the live address with a serialize-safe search and replace, such as WP-CLI search-replace.
Is a full push ever the right choice?
Yes, for sites where nothing new is created on live between the clone and the push, such as a small brochure site with a content freeze.
Can Revertix push staging to live for free?
No. Creating staging copies, backups, migration and rollback are free. Push and pull sync between staging and live is part of Revertix Pro.
Want someone else to handle the push?
If you would rather not risk your live store, our WordPress maintenance plans include updates with an extra backup before every update or change. For a one-off job, get in touch and tell us what you changed on staging.